Category Archives: Cook

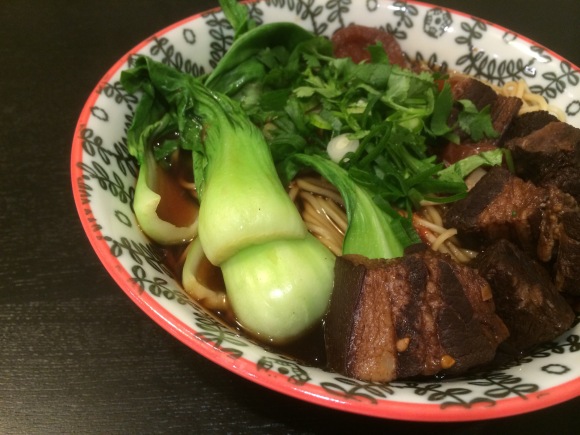
BEEF NOODLE SOUP SUCKAZ!

IMG_5314

There really is nothing more comforting and delicious than a big bowl of hot broth with noodles and meat. Bonus points if there is a layer of fat on top of the broth, waiting to coat the noodles with flavorful stickiness as you lift them out and up to your mouth. Gawd I love noodle soup. Except for udon.

Beef noodle soup is a popular Chinese dish with many different iterations, depending on where you get it. You can have it with dark broth, with light broth, with ox tail, with shank, with hand drawn noodles, with shaved noodles, or with store-bought ghetto noodles. My personal favorite is the dark, soy sauce based broth, with stewed beef shank and tendon. If you order it from a restaurant it’s called hóngshāo niúròu miàn (I copied and pasted that from eatingchina.com so I think it’s right). Literally translated, it means red braised beef noodle. It gets its name from the red color the beef gets after being braised in soy blah blah blah who cares. It’s effing delicious is all you need to know.

I hardly took any pictures during the cooking process this time around… I was cooking for a group of people and just didn’t have time. It’s pretty straight forward though, and you can cook it all in one pot (the best kind of cooking).

I DID however take a couple pictures of the special/hard to find ingredients. Here are the noodles I used:

IMG_5318

You can use Wei Chuan noods too, they are fantastic.

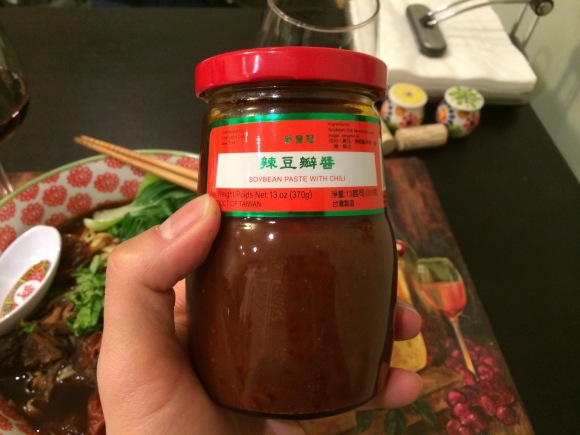
Here is the hot bean paste I used:

IMG_5325

And here is how to assemble:

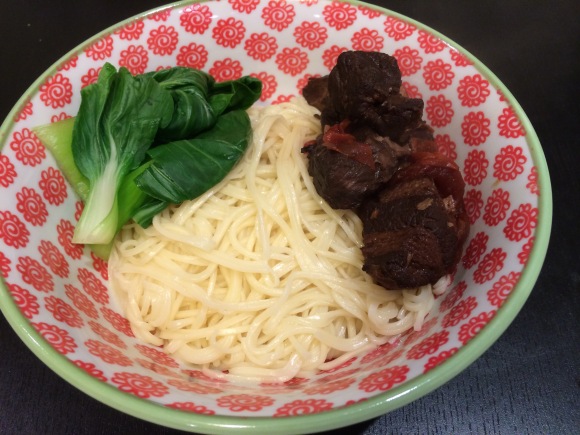
Noodles.

IMG_5319

Top with bok choy and beef chunks. Also, I added pork belly to the recipe because I’m an American, dammit.

IMG_5321

Top with broth, garnish with cilantro and sliced green onion.

IMG_5323

Have at it!

INGREDIENTS:

Soup:

2 lbs beef chuck or beef shank, cut into 1 1/2″ cubes
1 lb pork belly, cut into 1 1/2″ cubes (the piece I got was still on the bone, so I threw the bone in as well. That was a good choice)
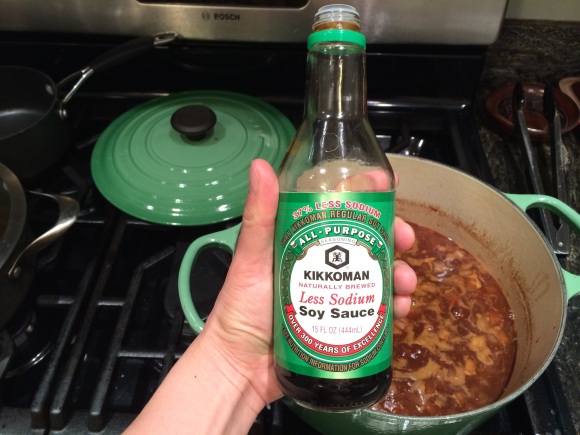
1 cup soy sauce (I used a combo of about 80% low sodium and 20% dark soy sauce)
1/2 cup dry red wine
2-3 tbsp turbinado sugar (sorry, wasn’t measuring.. start with 2, then add more to taste later on)
2 star anise
2 tsp of ground schezuan pepper
1 knob of ginger, peeled and sliced thin (about 2″ long, 1″ diameter)
10 cloves garlic, minced
2 tomatoes, quartered
6 cups of water

Noodles:

Wei Chuan Noodles, cooked per package

Garnish:

Bok Choy, leaves peeled off individually and blanched for 1 minute
Cilantro, chopped
Green onion, thinly sliced
Hot bean paste

DIRECTIONS:

Bring a large, heavy-bottomed pot of water to a boil. Add your beef and pork belly and blanch the meat for about 1 minute. The water should look a little cloudy and the meat cooked on the outside. Remove the blanched meat and reserve for later. Dump the blanching water.

Fill the pot back up with all the soup ingredients except the meat and tomatoes and bring to a boil. Return the meat to the pot and bring the heat down to low. Cover and simmer for about 3 hours.

Add the tomatoes to the pot, cover and simmer for another 30 minutes. If you want your broth spicy you can add a tablespoon of the hot bean paste at this point as well.

When the soup is done cooking, bring a smaller pot of water to boil. Blanch the bok choy leaves for 1 minute and remove. Cook your noodles according to the package (usually about 5 minutes), and place in bowl.

ASSEMBLY:

Place your bok choy on top of the noodles, fish out a few chunks of beef and pork belly, then ladle a good amount of stock over the whole thing.

Garnish with sliced scallions and cilantro and dig in, you animals.


Tagged , , , , , ,

Sliders- 2 ways

IMG_4695

Burgers may seem like humble food but listen up- burger making is an art. There is certainly technique and timing involved if you want a juicy, crisp on the outside, juicy on the inside patty, a lightly toasted bun, and cold, crisp veggies that crunch with each bite. Listen, if you’re gonna make a burger, do it right or don’t do it at all.

This post is more about tips and techniques to help you make a better burger. For fun, I did make two different kinds: a classic American, and a teriyaki shiitake with spicy pickles. See below for the teriyaki sauce and pickle recipes, but if you want to up your burger-making game, read the whole post. To help you in the reading of this post, I’ve put all my burger-making rules in bold italic. Take notes.

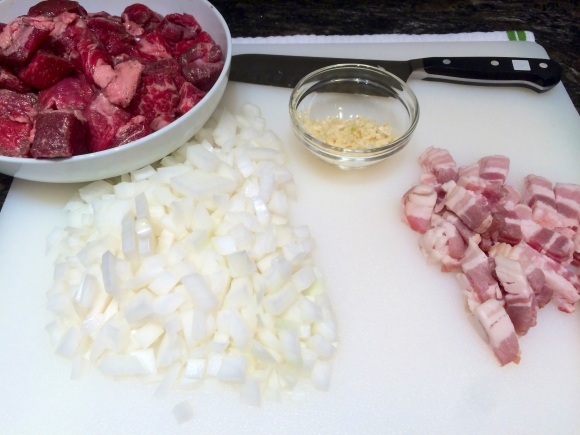
Let’s start with the meat:

IMG_4669

They say 80/20 is best (80% lean, 20% fat), and I agree. Start by rolling the meat into even-sized balls.

IMG_4672

IMG_4675

Smash each ball into a 1/2″-thick patty, smoothing out the edges so it doesn’t fall apart on the grill. Here’s a good rule of thumb: whatever size burger your making, always make your patty slightly bigger than the size of the bun, because there’s a lot of fat in those meat pucks and they WILL SHRINK as they cook. There are few things I dislike more than an excessive bun to meat ratio, so do this and you will thank me. Or I will thank you, whatever.

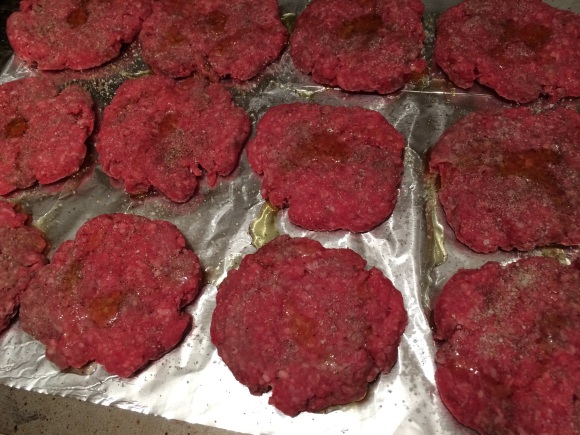
Another good rule of thumb (literally): After forming your burgers, stick your thumb into the middle of each patty to create an indentation, so that the center of each patty is thinner than the outside. Burgers tend to swell up in the middle as they cook, and if you have a completely flat raw patty, you will end up with more of a football-shaped patty when cooked. Making this little divot in the middle counteracts this burger phenomenon. This rule right here might be the only good thing I’ve gotten from Bobby Flay.

One last patty forming rule: try not to work the meat too much. The more loosely-packed the patty, the more tender it will be when you bite into it. The patty should just hold together so you can gently scoop it up without breaking it in half. Grease some foil on a cookie sheet and lay your patties on there as you wait for the grill to heat up, then the next important step:

IMG_4676

Place your patties in the freezer for a good 5-10 minutes so they chill and firm up. This is important for a couple reasons: 1. It makes handling your loosely-packed patties easier since cooling them down will firm them up and keep them in one piece, and 2. Chilling your meat and then placing them on a HOT grill will allow the outside to caramelize and crisp up before all the fat heats up and renders out, giving you JUICY burgers.
IMG_4683

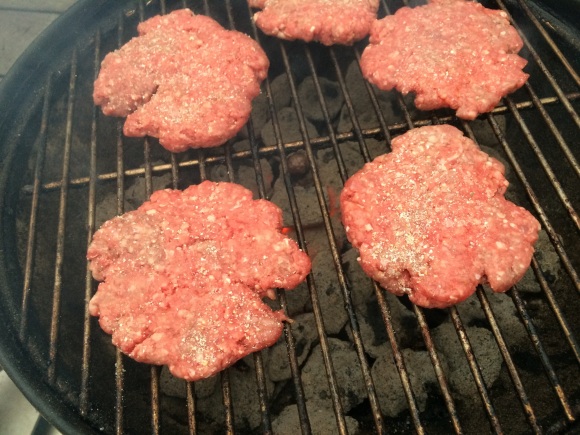
SO, once your grill is SEARINGLY hot, drizzle a little olive oil on your patties, season liberally with S&P, and get those bad boys cooking. Listen- a lot of people like to fancy up their burgers with minced onions, chopped herbs, Worcestershire sauce, etc mixed into the meat. STOP THAT! I would say it’s permissible if you’re using other types of meat (like turkey or lamb), but if you’re using ground chuck (or better- chuck/rib/sirloin blend), just let the beef speak for itself. Salt, pepper, maybe some garlic powder is all you need.
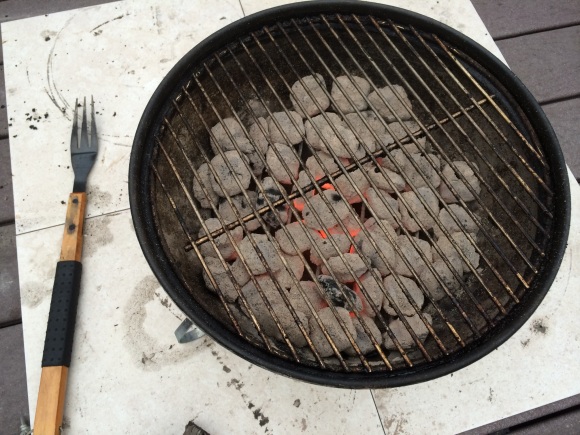
IMG_4684

IMG_4685

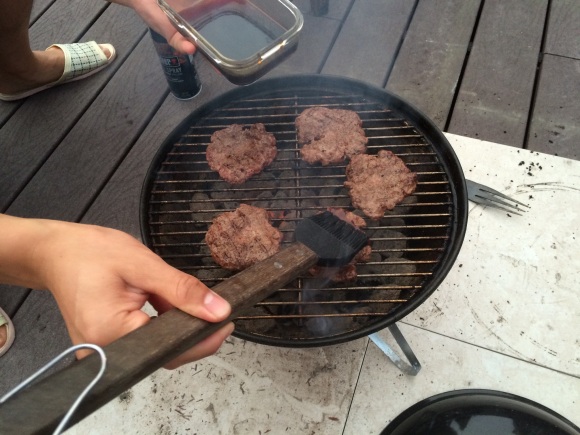
Ashy, glowing coals = HOT. Place your patties seasoned-side down, then season the other side while the bottom is cooking. 1-2 minutes on each side should do it.
IMG_4686

Flip your patties. This is the time you want to brush on any sauces if you’re going for any specialty burger (e.g. teriyaki burger). If you’re going classic, wait another minute as your burger continues cooking.

If you’re gonna add cheese, which I suggest you do, wait till the burger is almost done to your liking, then lay your cheese (I prefer good ol’ gooey American) on each patty and cover the grill for about 15-30 seconds to allow the cheese to melt. If you’re using a thicker or heartier cheese (like swiss or sharp cheddar) put it on a little earlier because it takes longer to melt. Personally, I don’t know why you would ever use swiss though. That cheese is the worst.

Okay, that about does it for the burger cooking portion. Let’s work on some accoutrements:

IMG_4668

These are thinly sliced persian cucumbers with some salt added.

IMG_4678

This is what happens when you leave salt on thinly sliced cucumbers for 10-15 minutes.

IMG_4679

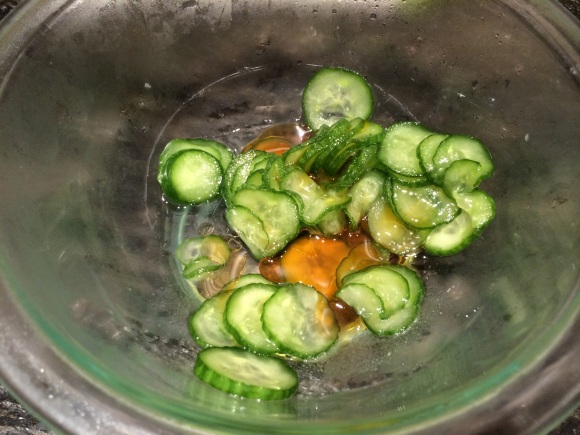
These are the salted cucumbers after you have squeezed out as much water as you could from them. Coincidentally, they are now ready for (quick) pickling.
IMG_4682

Add your vinegar, your sugar, your sesame oil, and voila!

By the way, this is what spicy sesame oil looks like: IMG_4681

I also sautéed some sliced shiitake mushrooms for this burger but forgot to take pictures. It’s pretty straightforward: sauté some thinly sliced shiitake mushrooms in olive oil and a little salt and soy sauce, reserve for burger topping.

OKAY let’s talk construction. For goodness sake, TOAST YOUR BUN. Having a nice, crispy, buttered and toasted inner bun will add a little more depth in texture, and also protect your bun from getting too soggy and mushy once your patty is on there and dripping those delicious juices.

Another thing: BUN BREAD IS IMPORTANT. Any health benefit a dry, mealy, whole wheat bun can offer will not make up for the soft, pliable, toothsome and slightly sweet goodness you would be missing out on if you had a Martin’s Potato Bun instead. It’s no secret that these are the buns used by my beloved Shake Shack, so if it’s good enough for the Shack, then it’s probably way too good for me. But whatever I’m using it.

So yeah, toast your bun. You could simply slather a little mayo or melted butter on the inside of your bun and throw it on the grill (open side down, of course).

IMG_4692

Then assemble! I like to keep all the raw components nice and cold– lettuce, tomato, and pickles stay in the fridge until time to build. My beloved In-N-Out keeps their veggies cold and crisp, and if it’s good enough for them… you get the idea.

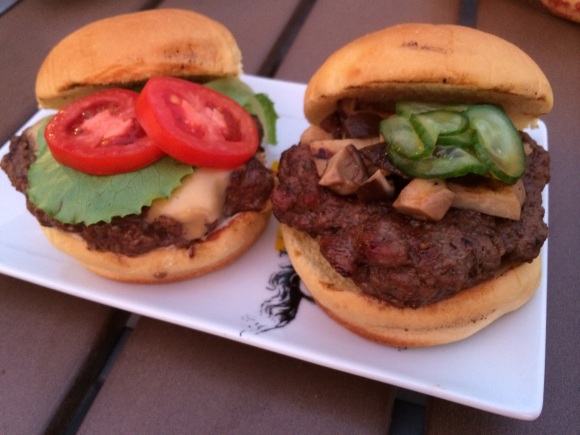
IMG_4694

Yum. I just like a little mayo on my burgers, but feel free to add whatever sauces you like. If you want a Shack Sauce clone recipe, check it out here: epicurious’ secret sauce clone.

Happy Grilling!

BURGERS:

INGREDIENTS:

1 1/2 lbs ground 80/20 chuck (80% lean, 20% fat, grass fed if you can swing it)
House seasoning (equal parts salt, pepper, and garlic powder)

DIRECTIONS:

Get the charcoal going on the grill.

Divide beef into 12 equal balls. The easiest way to do this is to divide all the beef into 2 halves, divide the halves into threes, and divide each third in half again. Roll each portion into a loosely packed ball.

Press each ball into a patty between your palms, then using your thumb, press a little indent into the middle of each patty. The patty should be slightly bigger in diameter than the buns you use (I’d say about 10-15% bigger).

Throw the patties in the freezer for 5 minutes, pull them out, season tops with garlic salt and pepper. Make sure the grill is HOT HOT HOT*, then throw them seasoned-side down on the grill. While grilling, season the other side the same way. Flip each burger once the bottom is browned and there are visible grill marks (about 1-2 minutes, depending on how “done” you want your burger, I like mine medium-just a little pink in the middle).

After flipping, add your cheese (for the classic burger) or brush with teriyaki sauce (for the shiitake burger), cover, and grill another 30 seconds or so until the cheese melts.

*chilling the patties, then grilling them on a super hot grill will let the patties brown and caramelize without all the fat rendering out right away. This is how you get juicy burgers, boiiiiiiii.

EASY TERIYAKI SAUCE:

INGREDIENTS:

1/2 cup soy sauce or tamari
1/4 cup rice wine (sake or shiaoshing cooking wine is fine)
1 tbsp honey
1 tsp fresh grated ginger
1/4 cup pineapple juice

DIRECTIONS:

Combine all ingredients and simmer over medium low heat until the sauce has thickened slightly and reduced about 10% (10-15 minutes).

QUICK SPICY PICKLES:

INGREDIENTS:

1 Persian Cucumber, thinly sliced
1/2 tsp kosher salt
1 tbsp rice wine vinegar
1 tsp sugar
1/2 tsp sesame oil
1/2 tsp spicy sesame oil

DIRECTIONS:

In a bowl, sprinkle salt over the cucumbers. Let sit at room temperature about 20-30 minutes as the moisture gets pulled out. When you see about a tablespoon of liquid at the bottom of the bowl, stir the cucumbers around and in small handfuls squeeze out any remaining liquid from the cucumber slices.

In a separate bowl, mix the squeezed out cucumber slices with the vinegar, sugar, and both sesame oils. Refrigerate until ready to use.

SAUTÉED SHIITAKE MUSHROOMS:

INGREDIENTS:

2 cups Thinly sliced shiitake mushrooms
1 tsp Soy Sauce
1 tbsp Olive Oil
Salt

DIRECTIONS:

Saute the mushrooms in the oil over medium high heat, sprinkle salt and a splash of soy to the mushrooms, cook until tender.

Beer Pairing Recommendation: Anything. Really. It’s a burger. Go crazy! Okay if you’re really lost on this, I’ll give you a suggestion: Bear Republic Hop Rod Rye. Hoppy, peppery, but not so bold that it will overwhelm the burger. Enjoy!
Tagged , , , , , , , , , , , , ,

Garlic and Herb Oven Fries

IMG_5249

Doesn’t that look good? And to think, it started out looking like this:

IMG_5224

Well that looks pretty good too but we can’t eat it like that, can we? So how do we turn those ingredients into delicious fries? Well I’ll tell you.

IMG_5226

Peel the sweet potato and cut all potatoes into 1/2″ wide fries. Coat with olive oil, season with S&P

IMG_5231

I’m using a silpat here because the last time I made these, the potatoes totally burned on the bottom and a lot of them stuck to the pan, leaving the crispy delicious crust to be washed away in the sink like so many bowls of soggy cereal. It was a travesty. The silpat will allow the potatoes to cook and get slightly crisp without sticking or burning.

IMG_5244

After about 15 minutes the potatoes should be pretty soft. Ditch the silpat at this point to let the potatoes come in direct contact with the pan, letting them really get that crispy crust that I know you all want in your fries.

IMG_5235

MEANWHILE, start heating your olive oil over LOW heat. This is for your garlic and herbs. We’re not here to cook them, just get their flavors infused into the oil.

IMG_5236

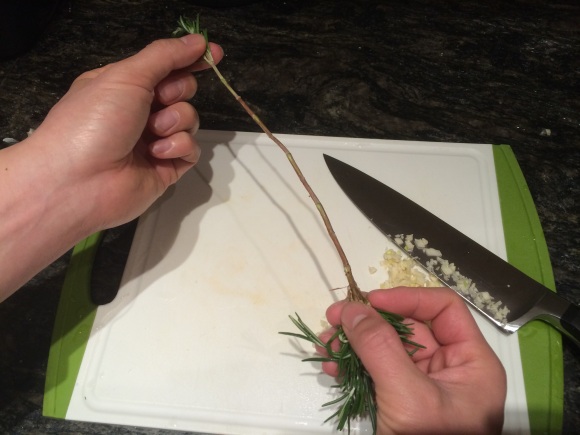
When stripping the herbs off their branches, it’s easiest to hold the top of the sprig (the end the leaves are pointing towards), then with your other hand, lightly grasp the branch and pull down, plucking the leaves off as you go. Do this with the rosemary and thyme. You know what to do with the garlic.
IMG_5242 IMG_5243

Chop up your herbs and throw it into the warm oil with the garlic. If you hear a sizzle, IT’S TOO HOT. Turn down your heat or just take the oil off the burner. Let the garlic/herbs steep a bit.

IMG_5246

After the fries have browned a bit and crisped up on the bottom, flip them all over and throw back in the oven. Bake a little longer.

IMG_5247

Throw your fries in a bowl, pour the garlic/herb/oil mixture over them, and toss. Bonus points if you can toss them by only flicking the bowl and not using any utensils.

IMG_5248

Season with a little more salt and pepper and dig the heck in.

INGREDIENTS:

1 large sweet potato
3-4 Yukon Gold potatoes
2 cloves garlic, minced
1 long sprig rosemary
4-5 sprigs thyme
About 5 tbsp extra virgin olive oil
Salt and Pepper

DIRECTIONS:

Preheat oven to 425 deg.

Peel the sweet potato. Cut potatoes into 1/2″ wide fries. Toss them in a large bowl with 1-2 tbsp of olive oil and the salt and pepper. You don’t have to be exact here, just make sure each fry is coated and seasoned. Place the fries on a large silpat placed in a cookie sheet, trying to keep each fry separate from the others. Roast for 15-20 minutes until the potatoes get soft.

Meanwhile, heat 3 tbsp of olive oil in a small saucepan over LOW heat. Strip the leaves off the herb sprigs, and give them a good chop. Add the garlic and herbs to the olive oil and let them steep in the oil. The oil should be warm but not hot enough for the garlic/herbs to fry. If you hear a sizzle when the herbs hit the pan, it’s too hot.

Remove the potatoes from the oven, then ditch the silpat. Pull the silpat out from under the fries, drizzle a little more olive oil on them (or use cooking spray), and again make sure the fries aren’t touching. Return them to the oven for 5 more minutes. Remove from oven and start flipping the fries over. The bottom of the fries should be browned by now. Continue flipping all the fries then return them to the oven for another 5 minutes.

Once the fries are browned top and bottom, remove them, then return to a large bowl. Pour the garlic/herb oil over the fries and toss quickly. Serve!

NOTE: if you don’t have a silpat, or if you want crispier fries, you don’t have to use one. Just check on them more often to make sure they’re not burning.

Tagged , , , , ,

Italian Sausage and Orzo Soup

So this happened today:

IMG_5198

Yes, #Juno was going on all day today outside my window. What’s a home cook to do? Cook I guess.

Lucky for us, I just happened to have all the ingredients for this delicious, soul-warming soup:

IMG_5145

This soup is so easy and so good. It’s one of my favorite things to whip up in the winter, and the great thing about it is that it’s made up mostly of things I usually already have on hand, and you should too.

IMG_5171

Start with the sausage. I actually don’t usually have this on hand, but it’s not a bad idea to have a couple packs in your freezer handy for pizzas, pasta sauces, etc. Remove the sausage from its casings. For me, it’s easiest to do this with a serrated steak knife.

IMG_5137

Once you’ve browned the sausage, add your onion and garlic. Those are two things you should always have on hand, BTDubs. Those are staples that you can throw into almost anything and it’ll be good.

IMG_5139

Once the onions become shiny and translucent at the edges, add your chicken stock. I always have boxed chicken stock on hand because it can add a lot of flavor to simple dishes like mashed potatoes, stir fry vegetables, pasta, and soups (case in point). In a pinch you could also just pop open box and boil up some wonton soup with it. It’s a must have.

IMG_5140

Throw in a parmesan rind. I usually have whole parmesan on hand because it’s just so much better to have fresh grated parmesan than the dry, powdery, pre-grated stuff. Parmesan is great too because it lasts forever in the fridge and once you’re through you can save the rinds in the freezer. Add the rinds to soups, tomato sauces, whatever you want to give it an extra savory, funky hit.

IMG_5141

Add your can of diced tomatoes and orzo pasta. Canned diced tomatoes are always in my pantry for a quick tomato sauce or chili or for this particular soup. I also usually have orzo… not really as versatile but it goes great in this soup and I do love a good orzo pasta salad.

IMG_5142

After the tomatoes and pasta have been cooking for 5 minutes, add your escarole and canned white beans. Canned white beans make a great bean dip (think hummus but with white beans), and are great just stir fried with kale or thrown into a bean salad.

IMG_5143

Let it bowl down and that’s it! It’s even better after it’s been sitting a while and the starch from the pasta thickens it all up. Serve with fresh grated parmesan and dig in.

INGREDIENTS:

1 lb Italian Sausage (hot or mild, up to you), casings removed
2-3 cloves of garlic, minced
1 medium onion, diced small
1 10-oz bag of chopped kale or escarole
1 15-oz can of diced tomatoes (no salt added)
1 15-oz can of white beans (low sodium), drained
1 32-oz box of chicken stock
1/3 cup of orzo
1 parmesan rind
1 tbsp olive oil

DIRECTIONS:

Heat a large soup pot over medium-high heat, add olive oil and heat, then add the sausage. Saute the italian sausage, breaking it up into small pieces. When the sausage is browned, add the garlic and onion and saute until the onion starts to glisten and turns translucent at the edges. If there is excess oil, remove some of it so there is about a tablespoon remaining. Add the entire box of chicken stock and bring to a boil. Throw in the parmesan rind. Bring back to a boil.

Add the can of diced tomatoes and bring back to a boil. Add the orzo and boil for another 5 minutes.  Add the kale/escarole and the white beans and boil for another 10 minutes, or until the greens are tender.

Remove the parmesan rind, ladle into bowls, serve with fresh grated parmesan and grilled crusty bread.

Enjoy. Winter has come.

Beer Pairing Recommendation: BEER WITH SOUP? WHY NOT? Anderson Valley Winter Solstice Seasonal Ale

Tagged , , , , , , ,

100% All-Beef Stew

IMG_5169

Does anyone else think it’s funny that McDonald’s still advertises it’s burgers to be made with 100% all-beef patties? Like they should get a prize? Well done Mickey-D’s! You could have just stopped at 95%, which we all know is well within A-range, but instead you went above and beyond and went for the FULL 100% of what really should be the only ingredient in any burger. Just wondering, what percentage of your burger patty would you, the American consumer, be okay with not being beef? 2%? 0.05%? What would that 0.05% even be if not beef? If it’s rat feces then no thank you.

Let’s be real though, I’m pretty sure 0.05% of everything we ingest is probably rat feces. Just saying. Also, I like McDonald’s. Really. Give me a Big Mac and I’m a happy man. Also also, should we be worried about the fast food chains that DON’T advertise their burgers to be 100% all beef?

Anyway, here’s a recipe for beef stew:

IMG_5128

I splurged and bought a beautiful grass-fed chuck roast the other day and decided I was going to make one of my favorite winter foods: stew. Nothing is better on a freezing day then a bowl of beef, potatoes, and carrots, in a savory gravy with crusty bread on the side. NOTHING.

Couple things: This is the first time I’ve tried making beef stew starting with a full chuck roast, rather than buying already cut up stew meat. This is also the first time using grass fed for beef stew. I am being honest here: IT TOTALLY MAKES A DIFFERENCE. Buying the chuck whole and cutting it myself not only let me control how big I wanted the chunks to be (they’re usually too big for my taste when you buy stew meat already cut up), but it allowed me to keep as much or as little of the fat on the meat as I wanted, and it also let me cook the meat as soon as it was cut, instead of letting it sit out for who knows how long, with tons more surface area to dry out and collect microbes. Also grass fed really does taste better and is better for you. Check it out.

IMG_5130

It’s so beautiful.

IMG_5146

This is all you need to start. Don’t forget that bacon. You have been warned.

IMG_5147

Brown the bacon, leave the fat. If there’s too much fat leftover, spoon some out but leave about 2 tablespoons. Yes there’s one full piece of bacon in there that was just for me. Get off my back. Oh and I hope this goes without saying, but don’t throw away those bacon bits. Reserve for later.

IMG_5170

LISTEN TO ME. BROWN YOUR BEEF IN BATCHES, IN A SINGLE LAYER. In this 5 qt dutch oven I was able to brown them all in 2 batches. If you don’t do this, it won’t brown, and if it doesn’t brown, then you might as well just give it to your dog. This is serious, folks. Once all the meat is browned, set aside with your bacon.

IMG_5151

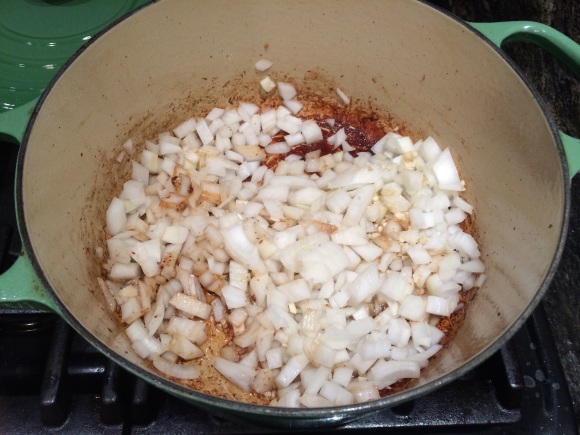
Here’s where it starts to get a little tricky. Saute your onions and garlic in all the leftover fat (again remove some of it’s excessive, leaving about 3-4 tbsp).

IMG_5152

Once the onions are shiny and starting to turn translucent, add your tomato paste. Let that brown for about 5 minutes, mixing with the onions.

IMG_5153

Add your flour. I know, there’s a lot, but we’re also adding a lot of liquid, so it’ll thicken it all up. If you like a runnier stew, you can use less flour, but I wouldn’t go less than 3 tbsp. Let the flour mix with the fat and tomato paste, letting it continue to brown. There will probably be some burned bits at the bottom of your pot but it’s okay. Just keep everything moving.

IMG_5154

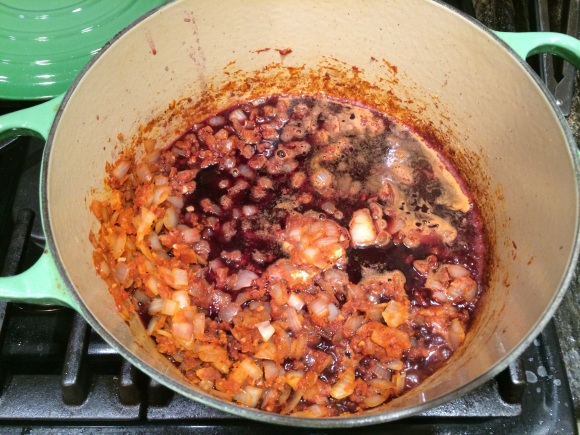
Add your wine. I just used a red table wine. You can use any dry red wine you like, but the rule of thumb is use a wine you would actually drink. Mix it all together and try to dissolve as much of the flour as you can. FYI: It’ll get pretty sludgy.

IMG_5158

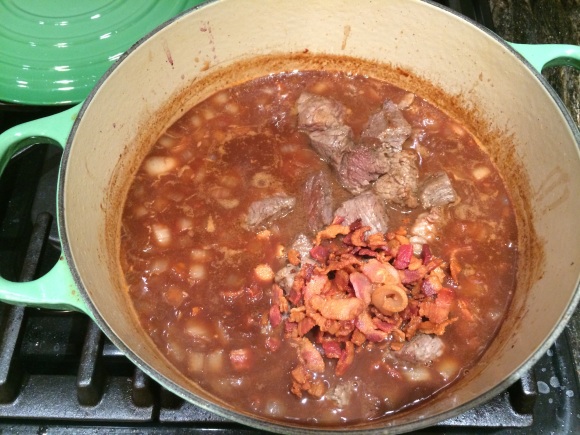
Add your beef broth and mix to dilute the sludgy red wine, then return the beef and bacon back to the pot.

IMG_5155

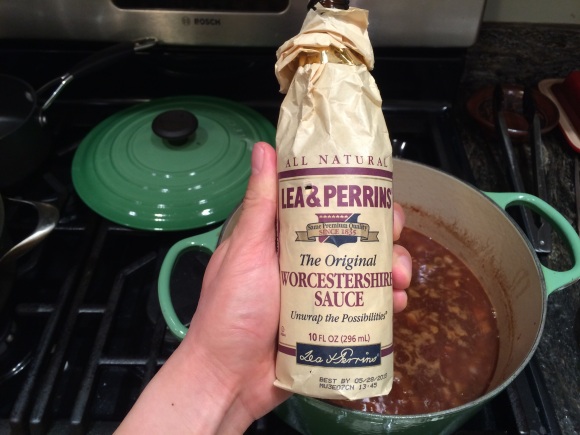
Add a few dashes of this.

IMG_5157

Add a tablespoon of that (this is my secret guys, you’re welcome).

IMG_5163

And last but not least, your bouquet. I also threw in 2 bay leaves but I forgot to take a picture of it. Cover it with a tight-fitting lid, then throw it into your oven for 1 hour 15 minutes at 300 degrees.

IMG_5165

It’s gonna come out looking reduced and smelling like delicious. This is when you add your carrots and potatoes, so they don’t overcook and dissolve into your stew. Add a little water if needed to make sure everything’s submerged. Cover, and throw back into the oven for another 45 minutes, or until the veggies are tender. When it’s done, remove your thyme sprigs and bay leaves, and serve it up!

IMG_5167

INGREDIENTS:

2 lbs beef chuck roast, cut into 1″ cubes
4 slices of good quality bacon, sliced
1 medium onion, diced small
4 cloves garlic, minced
32 oz beef stock
1/3 cup flour
1/2 bottle of good dry red wine (about 2 cups), I used a malbec
3 medium potatoes, diced (about 1 1/2 cups)
4 medium carrots, sliced (about 1 1/2 cups)
2 tbsp tomato paste
5 dashes Worcestershire sauce
1 tbsp soy sauce
5 sprigs thyme, tied together with butcher’s twine
2 bay leaves
1 tbsp olive oil

DIRECTIONS:

Preheat oven to 300 degrees. Season beef liberally with salt and pepper. Let sit.

Heat a large dutch oven (5 qt) with the olive oil over medium-high heat, brown the bacon, rendering the fat out. When the bacon is browned, remove it from the heat and reserve in a large bowl for later. Remove some of the fat but leave about 2 tbsp in the dutch oven.

Brown the seasoned beef in the remaining fat IN BATCHES (keeping beef in a single layer each batch). Remove the beef and set aside with the bacon.

Again, if there is a lot of fat left in the pot, remove some of the fat so about 4 tbsp remain, then add your onion and garlic and sautee until the onion starts to become translucent, about 7 minutes.

Add tomato paste and brown for another 5 minutes.

Add the flour and brown that for yet another 5 minutes.

Add the wine and stir, letting it incorporate with the flour and tomato paste, until it reduces slightly and thickens up to a sludgy consistency.

Add all of the beef stock and stir so the whole mixture dilutes.

Return the beef and bacon back to the pot along with any juices that collected in the bowl. Add worcestershire sauce and soy sauce, throw in your thyme and bay leaves, give it a stir, and cover the dutch oven with a tight-fitting lid. Put the entire thing in the oven for 1 hour and 15 minutes.

After 1 hour 15 min, throw in your potatoes and carrots, adding some water if necessary so everything is covered with liquid. then throw back into the oven for another 45 minutes.

Remove bay leaves and thyme. Serve with crusty bread. Enjoy your 100% beef stew!

Beer Pairing Recommendation: Anchor Steam Christmas Ale. Not sure what style this year’s beer is, but I think the flavors they tend to put into their seasonal will match the deep, earthy flavors of this stew.

Tagged , , , , , , , , ,

Bulgogi Ssam – Kim Chi Salsa

Hello loyal readers!

My sincerest apologies to all 12 of you for being MIA the last couple months. The truth is, once the weather got better here in Boston, this blog took a backseat to being somewhere outside in shorts and a bro tank and not freezing. I think I’ve gotten a lot of the bro-tank-wearing out of my system so I wanted to get back to it!

Another thing I’ve been meaning to talk about is this: I don’t like tons of pictures.  In fact, one point I wanted to make when starting this blog was NOT to put up a million pictures in every post.  Do you really need a picture of me adding a teaspoon of salt to a pot? That’s not exactly a culinary school skill.  That being said, I realized that I’ve started posting more and more pictures in each of my entries and become something of a hypocrite.  So from here on out I’m going to try my best to only put pictures up that I think are necessary to clarify one of my instructions. I have a feeling I’m still going to put up a ton but whatever you guys can keep me accountable.  Yes, the 12 of you.

Anyway, here’s some Korean food I recently made:

IMG_3841

This is a ssäm. It means “wrapped” in Korean. I just googled it. I’ve been eating this for quite some time in restaurants but never made it at home until I met my wife, who if you didn’t know, is Korean. It’s super easy. Also on top is a kim chi “salsa” I made.  I got the idea from David Chang on Mind of a Chef when he made a bulgogi burrito and I thought it was genius.

Okay let’s start with everyone’s favorite, the meat! Sorry if you’re favorite is actually the lettuce.

IMG_3806

Most Asian stores will have thinly sliced beef like this, sometimes labeled under “beef for hot pot” or “sukiyaki.” I went big time with the ribeye but you can also use round.

Now for the marinade:

IMG_3808

Puree your pear, your onion, and your garlic in the food processor until it looks like apple sauce like so.

IMG_3848

Add your puree to the meat, then toss in your soy sauce, your brown sugar, and your sesame oil.  If you’re using a meat like rib eye, be careful when mixing because all the marbling will make your meat literally fall apart.

The beauty of bulgogi is that it’s so thin that you really don’t have to marinate it long.  You can basically start frying it up immediately after the marinade is done.  I went ahead and let it rest for 30 minutes before starting to cook but I really don’t think you have to.

While I was waiting, I started on the kim chi salsa.

IMG_3847

Char a couple green onions for a little added roasty flavor.

Chop up your kim chi and throw it in a food processor with your green onions.

IMG_3826

Chop until everything is coarsely ground. Next add your cilantro and a squeeze of lemon (or lime)

IMG_3827

Process some more and you’ll be left with something that you could serve at your local taqueria! Or if you live in Boston, Qdoba.

IMG_3830

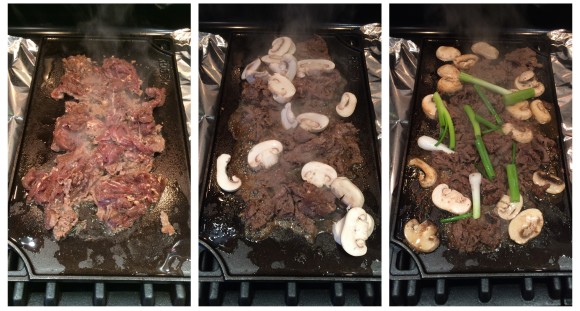
Okay let’s get back to the meat. It’s been marinating for a little while now, so all you need to do is throw it on the griddle.  If you don’t have a griddle, you can use a large skillet, but make sure you cook in small batches, otherwise all the liquid will come out and you’ll end up boiling the meat rather than grilling it, and that’s not nearly as delicious.

IMG_3846

You’ll notice I added some mushrooms and green onions to the grill. This is up to you if you want to do it.  Either way it will taste great.

BTW, I highly recommend getting a cast iron griddle/grill pan.  I use that bad boy all the time and get great results every time.  Make sure all the liquid cooks out and the meat actually starts to brown! It’s gotta be a little crispy otherwise you’re doing it wrong.

IMG_3839

Glorious.

You can eat this as is, or wrap it up in your favorite wrapper (seawead, rice noodles, or good ol’ red leaf lettuce) with rice, some ssamjang, and the kim chi salsa. Enjoy y’all.

BULGOGI:

1 Asian pear or crisp Bartlett pear
1 small onion
4 cloves garlic
1.5 lbs thinly sliced beef tenderloin or rib eye
1/4 cup soy sauce
1 Tbsp dark soy sauce
2 tsp dark brown sugar
A good squirt of sesame oil (about 1 Tbsp)

Pulse the pear, the onion, and the garlic in a food processor for about 15-20 seconds, or until it looks like applesauce. Combine the pureed mixture, the beef, both soy sauces, sugar, and sesame oil into a large bowl and mix gently to combine.

Once all ingredients are incorporated, heat a griddle over medium-high heat, or a 12″ skillet over high heat.  Add a little oil to the cooking surface and cook your bulgogi in batches.  Make sure not to crowd the cooking surface or too much liquid will run out of the meat and it will start to boil the meat rather than brown it.

Optional: add sliced mushrooms and green onion to your bulgogi while it’s cooking.

KIM CHI SALSA:
1 1/2 cups kimchi, roughly chopped
2 green onions, charred on grill
1 Roma tomato (optional)
Juice of half a lemon
Half bunch of cilantro (about 1 cup loosely packed)
Fresh ground black pepper

Char green onions and tomato on the grill, until they are slightly blackened.  Add everything to the food processor except the cilantro and pulse until finely chopped.  Add the cilantro and continue to pulse until it is a smooth, salsa-like consistency.  Serve it!

SSAMJANG:

No ssäm is complete without ssamjang, or literally, “sauce for ssäm.” So here’s the wife’s recipe for the sauce.  It’s so good.

1 part gochujang (Korean sweet red pepper paste) to 2 parts doenjang (Korean fermented bean paste, or Korean miso as some have called it).

That’s it.

Happy ssäm-ing.

Beer pairing recommendation: Stone Go To IPA. It’s light, it’s crisp, it’s refreshing, but still packs enough hoppy, citrusy flavor to make it interesting.  Would go well with the fruity flavor of the bulgogi and stand up to the strong taste of the kim chi and ssamjang.

Tagged , , , , , , , , ,

Clemenza’s Pasta Recipe – Herbed Meatballs – The Godfather

I love The Godfather.  It’s one of those movies that whenever it’s on, I’ll switch to that channel and watch it through to the end (yes, even though I own it on DVD). I can’t tell you how many times I’ve seen it.  Back to the Future, Pulp Fiction, and of course Shawshank are on that list as well. So good.

Do you remember when Clemenza was teaching Michael how to make pasta sauce (or if you’re from Jersey, spaghetti gravy)?  Maybe this will jog your memory:

“Hey, come over here kid, learn something. You never know, you might have to cook for 20 guys someday. You see, you start out with a little bit of oil. Then you fry some garlic. Then you throw in some tomatoes, tomato paste, you fry it; you make sure it doesn’t stick. You get it to a boil; you shove in all your sausage and your meatballs, eh? Add a little bit a wine… and a little bit a sugar… and that’s my trick.”
– Peter Clemenza, The Godfather

Ah Clemenza, you fat, lovable, cannoli-loving mafioso.

Anyway, here’s my rendition of Clemenza’s sauce.  You’ll find many different versions out there on the internet machine, but I really think that this is a recipe you can’t refuse.

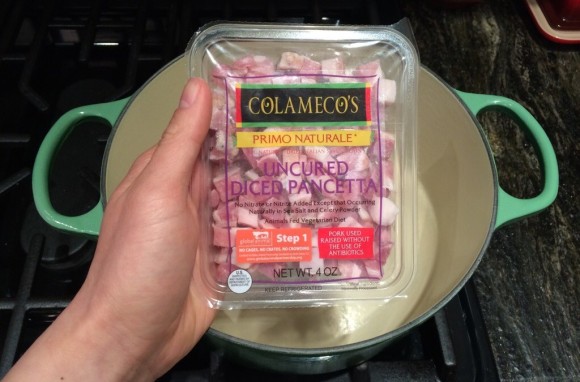
Let’s start with the sauce.  It’s pretty similar to the tomato soup recipe I just posted, but this time we’re gonna start with some pancetta:

20140426-185030.jpg

The next steps are pretty similar to the tomato soup recipe from a a few weeks ago… but let’s review:

20140426-185040.jpg

1. Render the fat outta the pancetta, then remove, saving it for later.
2. Remove some of the fat, leaving about 2-3 tbsp, then add 2 tbsp of butter, melt.
3. Fry your garlic, your onions, your bundle of thyme sprigs.
4. Add the tomato paste, and as Clemenza said, make sure it doesn’t stick!
5. Add a little bit of wine.
6. Toss in your tomatoes, some chicken broth.

Clemenza’s trick: the teaspoon of sugar

20140426-190359.jpg

And here’s a trick from goodwilltasting: the parmesan rind.

20140426-185102.jpg

You’ll remember these next steps if you’re a faithful GWT reader:

20140426-190601.jpg

1. Remove the parmesan rind and thyme sprigs
2. Turn off heat
3. Immersion blend (or puree in batches in a blender)
4. Add the pancetta back to the sauce, wise guy!

And that’s it, that’s the sauce. Believe me it is incredible.

Now for the meatballs, bambinos. Start with the bread crumbs.  I had some stale bread so I made my own, but you can definitely just buy them from the market.

20140426-190422.jpg 20140426-190433.jpg

Add some milk to the bread crumbs, let it get mushy.

20140426-190446.jpg

If you don’t know what loosely packed means, this here is loosely packed:

20140426-190501.jpg

Just lay the leaves in there, don’t stuff the cup, when you fill the measuring cup you’re done.

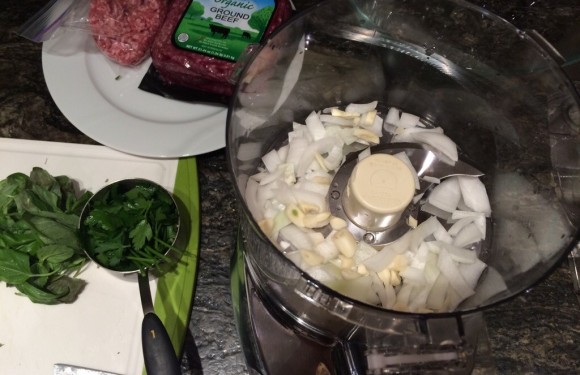
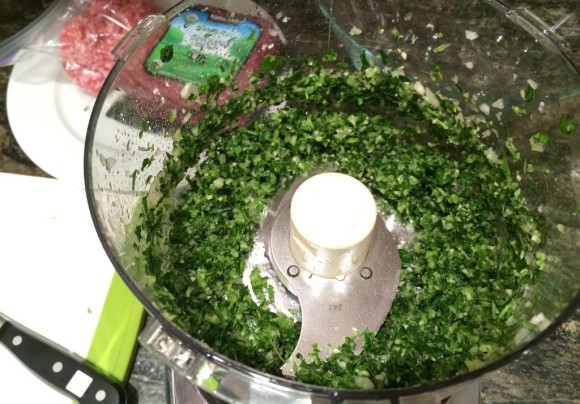
Next we bring out our good ol’ food processor for the onions, garlic, and herbs. Chop it good. And spend time with your family. A man who doesn’t spend time with his family can never be a real man.

20140426-190509.jpg 20140426-190520.jpg 20140426-190529.jpg

Okay here we go with the assembly. Basically just combine all the ingredients together in a big bowl, and don’t forget the cup of fresh grated parmesan. BE A MAN. USE YOUR HANDS.

20140426-190544.jpg

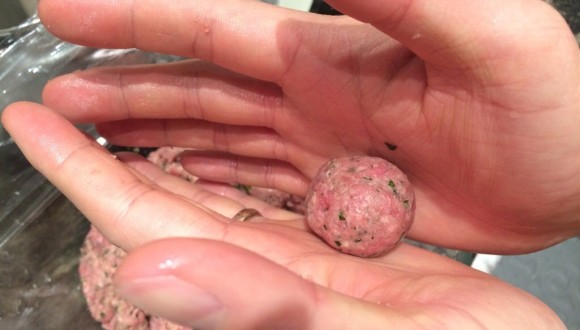
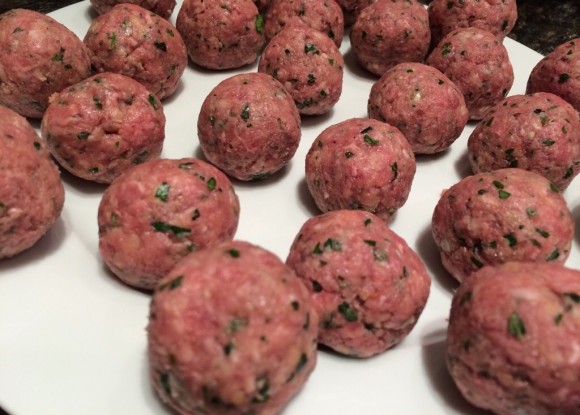
Now we make the balls. Here’s a tip, wet your hands with water so the meat doesn’t stick to your hands and so you can get perfectly round meatballs. I make them about 1-1.5″ in diameter.

20140426-190611.jpg 20140426-190620.jpg

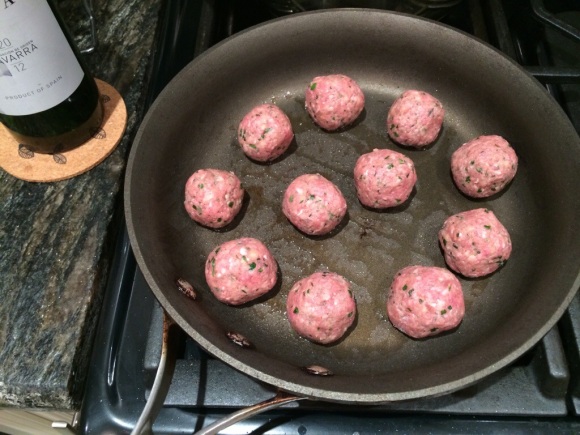
Okay here’s where it gets a little tricky: when you fry them, make sure you have enough space between them so you can roll them around and they don’t stick together.

20140426-190629.jpg

Once they get a nice brown on the bottom, start rolling them all slowly in one direction, then leave them to cook, until they get browned all over. I’m going clockwise because I assume that’s how the Corleones’ do it.

20140426-190638.jpg 20140426-190648.jpg

Once browned on all sides, place on a baking sheet and bake for 10-15 more minutes to complete cooking.

20140426-190658.jpg

Cook your sausage however you want. I just fried em up.

20140426-190707.jpg

Shove in all your sausage and meatballs. Notice I took some of the sauce out. I’m doing this because I want to freeze some for later. Yes I’m freezing half the meatballs too.

20140426-190723.jpg

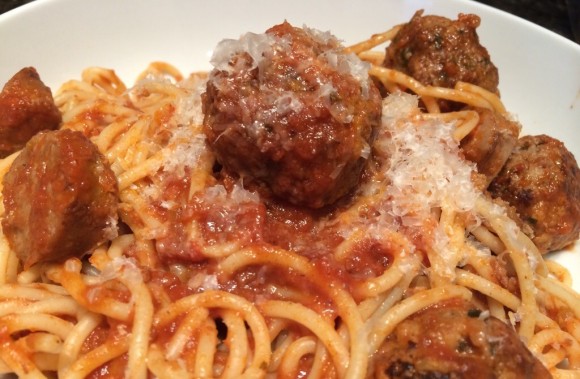
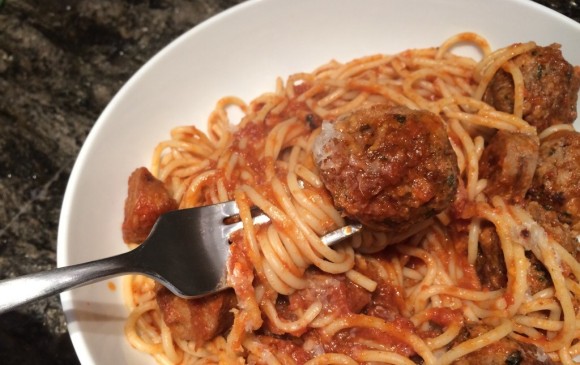
Boil your spaghetti per the package directions, combine with sauce, top with some parmesan, and you’ll be part of the family.

20140426-190733.jpg

Now that’s gangsta.

20140426-190745.jpg

TOMATO SAUCE
1 onion, peeled and diced
4 oz cubed pancetta (2 tbsp grease)
2 tbsp tomato paste
8-10 sprigs thyme, tied together tightly with butcher’s twine
4 cloves garlic, roughly chopped
2 tbsp butter
1 cup dry red wine
2 cups chicken stock
2 cups water
2 28-oz cans whole peeled tomatoes
1 tsp sugar
1 parmesan rind

Heat a large, heavy-bottomed soup pot over medium-high heat, add the pancetta and brown until most of the fat has rendered out. Remove pancetta and save for later, discard all but 2 tbsp of the pancetta grease. Add 2 tbsp of butter, then add onion, garlic, and thyme, and saute until the onion becomes translucent but not brown, 6-7 minutes. Add your tomato paste and brown for 3-4 minutes. Deglaze the pot with red wine, then add your tomatoes, stock, and water.

Now for Clemenza’s trick: add 1 tsp of sugar. And goodwilltasting’s trick: add 1 parmesan rind

Bring sauce to a boil, reduce heat to low and simmer for 1 hour. Sauce should be reduced by about 20%. Remove from heat.

Remove parmesan rind and thyme sprigs. Using an immersion blender, blend up sauce until smooth.  You can also puree sauce in batches in a blender or food processor. Add pancetta back to the sauce. That’s it!

HERBED MEATBALLS
1 lb ground beef (I used 85/15 ground beef)
1 lb lean ground pork
1 cup bread crumbs
1/2 cup whole milk
1 cup freshly grated parmesan reggiano 
1 cup loosely packed fresh basil (see picture above)
1 cup loosely packed fresh flat-leaf parsley
2 tbsp fresh thyme leaves
1/2 cup coarsely chopped onion
4 cloves garlic
2 large eggs
salt and pepper

If making your own bread crumbs, make sure you let the bread sit out overnight and dry completely, or you can put it in the oven at 250 degrees for about 30 minutes to dry. Pulse in the food processor until crumbs are even size. Add the milk to the bread crumbs and let it soak for 5 minutes.

Place onions, garlic, basil, parsley, and thyme in a food processor and pulse until finely chopped (see picture above).  Add this chopped mixture to the beef and pork in a large bowl, as well as your parmesan cheese, salt, and pepper. Squeeze out any excess milk from the bread crumbs and add to the bowl. Add the eggs and, using your hands, combine all ingredients until they are all well-incorporated. Cover with plastic wrap and let rest in the refrigerator for 30 minutes.

Preheat the oven to 350 degrees

Take the meat mixture out, wet your hands, and start rolling the mixture into 1.5″ diameter balls. When you have all your meatballs formed, heat a large skillet over medium-high heat.  Add enough olive oil to the skillet to get a thin coating over the surface, and start frying your meatballs. Make sure you have enough space between them so you can roll them around.  Once they get browned on the bottom (about 2-3 minutes), roll them slightly just until the next portion of raw meat on the meatball is in contact with the cooking surface. Continue rolling the balls around until it is browned all around.

Place your browned meatballs on a cookie sheet, bake for about 10-15 minutes until they are cooked through. Makes about 45 1-1.5″ meatballs

ASSEMBLY:

Fry up some hot italian sausage in the skillet, cut into slices, and add the sausage and meatballs to your tomato sauce. Simmer for another 15 minutes so all the flavors incorporate.

Meanwhile, boil your spaghetti according to the package directions until JUST al dente, or even a little bit undercooked. If you’re pro, add a ladle full of pasta cooking water to your tomato sauce, (this will make your sauce even more velvety). Drain pasta and return the spaghetti to the pot. Add your sauce and mix well over low heat. The spaghetti will continue to cook in the sauce and really absorb the flavor.

Serve with grated parmesan.

Beer pairing recommendation: Bittersweet Lenny’s R.I.P.A. Spicy, peppery, fruity notes complement this bold, sweet sauce and herby meatballs.

I’ll leave you with these words from Clemenza: “Leave the gun. Take the cannoli.” 

Tagged , , , , , , , , , ,

Wonton Soup

So… this happened yesterday:

20140417-194100.jpg

This winter is turning into that awkward friend who just won’t leave your house long after the party has ended. It just won’t take a hint! Look man, THE BEER IS GONE, THE HOUSE IS A MESS, JUST GO HOME SO I CAN SLEEP!  This is the LAST time I invite that guy.

Anyway it’s a good thing I have some of these handy:

20140417-193601.jpg

Those are frozen homemade wontons my friends. Mrs. Willtasting and I made a batch of them earlier this winter and I think they’re just what I need to forget this bizarro winter-in-April.

First, you’ll need some ground pork:

20140409-204526.jpg

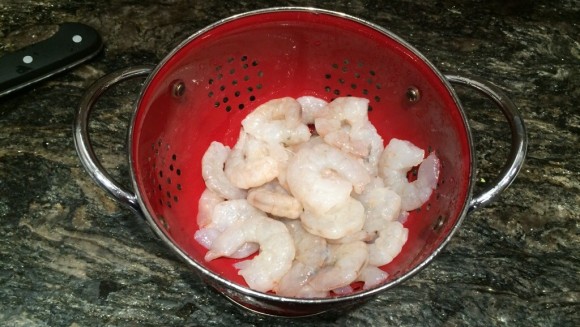
Next some peeled, deveined shrimp. I got lazy and bought mine already peeled, but chances are you’ll find fresher and cheaper shrimp if it hasn’t been peeled. Your call, boss.

20140409-204541.jpg

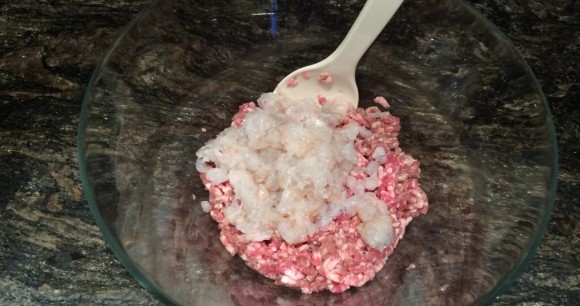
Chop up the scrimps (or however you want to pronounce them) and add to the pork. Green onions come next.

20140409-204555.jpg

20140409-204613.jpg

This is important, folks: the rice wine. This is also important: do not drink this.

20140409-204646.jpg

Sesame oil, egg, mix.

20140409-204711.jpg 20140409-204725.jpg 20140409-204747.jpg

Your wonton filling should look like the above picture… YUMMYYYYY. Everything should stick together, not crumble apart, almost like a dough. If it doesn’t look like that, slowly add more sesame oil and rice wine until it does.

Now, check it. This is how you fold your wontons:

20140409-204756.jpg

Wet one corner of the wonton skin, place about a half tablespoon of meat filling off center towards that corner, then fold over and pinch the edges together to make a triangle. Bring one of the smaller corners up to the larger corner and pinch together, then do the same with the other corner. That’s it! If you want to freeze some (which you most likely will, since this recipe makes A LOT of wontons), wipe a little oil over the surface of a large dish, place the wontons on the dish, and freeze in the freezer.  Once they are frozen you can keep them in zip lock bags and they will keep for 6 months.

To cook, just boil them in some chicken broth for about 10 minutes, or until the skin is tender and the wontons float to the surface.

20140409-204816.jpg

Serve with some green onions and thinly sliced fried egg, and quit beating around the bush and tell winter to go home already.

20140417-193608.jpg

WONTONS:

1 1/2 lbs ground pork
1/2 lbs shrimp
1 bunch green onions, thinly sliced (about 6 green onions, both white and green parts)
1/4 cup Shaoxing cooking rice wine
2 tbsp sesame oil
3 tbsp soy sauce
1 egg
1 tsp white pepper
2 packages of wonton skins

DIRECTIONS:

Combine all ingredients in a large bowl, mix well until the filling sticks together like a dough. To assemble wontons, place skin in one hand, wet the edges of one corner, place a half tablespoon of filling off-center towards that corner.  Fold skin in half, pinching edges together to form a triangle. Bring one side of the triangle up to the top corner, pinch together, then do the same with the other side. Or just look at the pictures up top because this is getting really hard to explain in writing.

SOUP:

2 cups chicken broth
1/2 cup baby spinach, loosely packed
1 green onion, thinly sliced
1 egg, beaten and fried into a thin crepe, then sliced thin.

To cook, boil 2 cups of chicken broth to boil, then add 12 wontons and boil for 10 minutes or until they float to the top. Put spinach in bowl and pour hot soup on top. Garnish with sliced green onions and egg.

Eat your winter blues away.

Tagged , , , , , ,

Tomato Parmesan Soup – Grilled Cheese Crouton

Ah, the after school special. Was there anything better than coming home after a long day of physics tutoring, marching band practice, and hours of working on your friend’s failed cable access television show than a hot bowl of tomato soup and grilled cheese? Okay, maybe your high school experience was different from mine, but I’m sure your feelings are the same for the soup and sandwich.

Well, we’re not in high school anymore, so it’s time to put away those Campbell’s condensed tomato cans and make yourself some big boy soup. Lucky for you, it’s a pretty easy recipe it will make enough soup for days. DAYS!

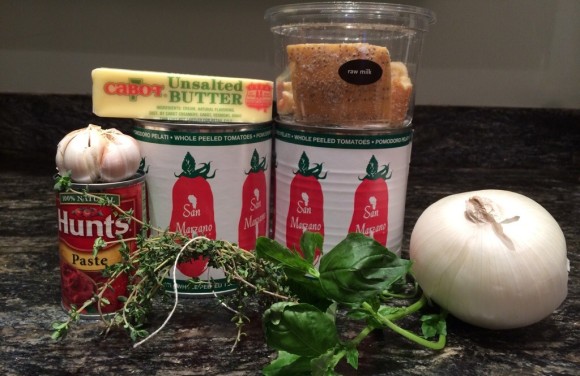
So I usually don’t spring for the San Marzano’s because, well, I’m cheap. But since the tomatoes are really the star of this soup those extra 3 bucks per can are gonna be worth it. Plus these were on sale so it was actually only an extra buck per can. Totally worth it.

20140409-200735.jpg

Start with the butter onion, garlic, and thyme. Tie the thyme sprigs together with some butchers twine or just string without any dyes. You’re gonna need to fish that out later on and tying them together will make your life a whole lot easier. Don’t worry about how big or small you chop everything, since that’s gonna be all blended up later on.

20140409-200751.jpg

Once the onion is translucent, add your tomato paste. Brown that junks and it’s gonna give you flavor for days. DAYS!

20140409-200803.jpg

Add your tomatoes, some broth, some water, and let the magic begin.

20140409-200853.jpg 20140409-200909.jpg

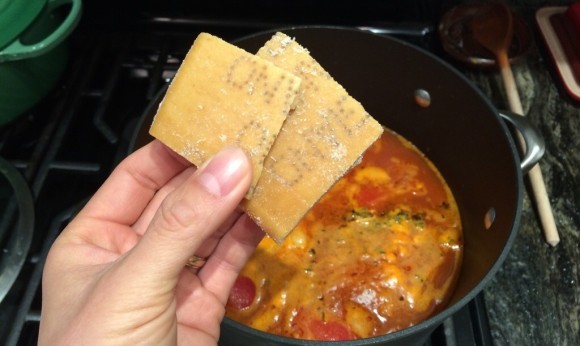
Oh yeah, don’t forget the secret ingredient: Parmesan rinds! Sounds weird but those things are totally edible.  I mean, I wouldn’t eat them straight up, but it’s great to add some body to soup or… stews. I don’t really know what else. If I think of anything I’ll let you know. So they sell these now at Whole Foods for like $50 or something ridiculous because it’s Whole Foods and they think they can sell you essentially kitchen scraps for top dollar.  They make me so mad sometimes!

…anyway I got these at Whole Foods.

If you buy fresh parmesan regularly (which I strongly suggest you do), you can always save the rinds yourself in the freezer and you’ll be good to go.

20140409-200925.jpg

After simmering for an hour or so, fish out your thyme and parmesan rinds.  The parmesan swells up, darkens in color, and kinda looks like pork belly at this point, but do not be fooled! It won’t be pleasant to bite into.

20140409-201035.jpg

Just got this immersion blender and I love it. Just a standard $30 Cuisinart, nothing fancy. It’s awesome.

20140409-201116.jpg

Add a little more parm, some S&P, let simmer a little longer, and you’re all set.

20140409-201138.jpg

It might be a little dumb to put up instructions on how to make a grilled cheese, but there are a few tricks I’ve picked up over my many years of grillin’ up cheeses that not all my know.

First thing: butter your bread FIRST. That way you’ll get a nice even brown on both sides with less chance of burning.

Second: I usually prefer good ol’ American cheese for my grilled cheese because it’s classic and when it’s melted it’s just so damn good. But since I’ll be cooking this a bit longer to make it crisp up, I’ll be using a sharp white cheddar that melts slower and will actually give you a nice crisp crust the longer you cook it.

20140409-201214.jpg

Remember: Butter side out!!

20140409-201225.jpg 20140409-204016.jpg

Cut it up into crouton-sized bites, throw it on some foil, pop ’em into your oven.

20140409-201255.jpg

The more you know.

tomato-parmesan-soup.jpg

TOMATO PARMESAN SOUP:

2 cans whole San Marzano tomatoes
10 sprigs thyme, tied together with butcher’s twine
1 medium onion, sliced
1/2 stick butter
1/2 cup basil leaves loosely packed
2-3 Parmesan rinds
1/2 cup grated Parmesan
1/4 cup tomato paste
4 cloves garlic, roughly chopped
1 tsp sugar
2 cups beef stock
6 cups water
Salt and Pepper

Melt the butter in a soup pot over medium heat. Add thyme, onion, and garlic. Cook until onion is soft and translucent, 10–12 minutes. Increase heat to medium-high and add tomato paste. Keep cooking, stirring often, until paste browns in spots, about 5 minutes.

Add tomatoes with juices, sugar, beef stock, and water to pot. Increase heat to high and bring soup to a simmer. Add the parmesan rinds and reduce heat to medium-low. Simmer until soup thickens and reduces by 20%, about an hour. Turn off heat and let cool. Remove thyme sprigs and parmesan rinds, discard… or eat… or do whatever you want with them. Add basil leaves, then using an immersion blender, blend soup until smooth, about 45-60 seconds.

If you don’t have an immersion blender, work in batches and purée soup in a blender or food processor until smooth. Return to pot. Heat and bring back to simmer for 10-15 more minutes.


GRILLED CHEESE CROUTON:

2 slices crusty italian bread
1-2 slices of white cheddar cheese
Butter

Pre-heat an oven to 250 degrees.

Heat a skillet on medium-high heat. Butter one side of each slice of bread. Place one slice of bread, butter-side down on the hot skillet, put cheese on top, then place the other slice of bread butter side UP on top of the cheese. Butter-side always OUT!

When the cheese is slightly melted and the bottom slice is evenly browned, flip the whole sandwich over and brown the other side.  Remove from heat and let cool.

Cut up the sandwich into crouton-sized bites, place on cookie sheet and bake in the oven for 20-30 minutes, or until the bread is dried and crisp.

SERVING:

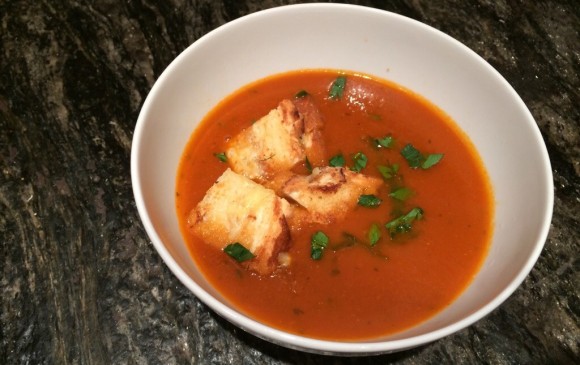
Ladle soup into bowls, top with 2-3 croutons, garnish with fresh chopped parsley.  Enjoy with some Lifetime Original After School Specials.

Tagged , , , , , , , , , ,

Carne Asada Tacos – Pico de Gallo – Creamy Tomatillo Salsa

“The coldest winter I ever spent was a summer in San Francisco.” -Mark Twain (supposedly)

“The coldest winter I ever spent was a winter in Boston.” -William Sam

So we’re a good 4 weeks into spring here in frigid Boston and this past weekend gave us the first semblance of mild weather in what seems like years.  I have long forgotten what warmth feels like, and I’ve worn my winter boots for so long that wearing sneakers now just feels like I have a pair of heavy socks on.  Here’s to warmer days ahead and to the beginning of slowly repressing all bad winter memories.

To celebrate the first nice weekend of spring, we decided to have ourselves a cookout, Mexican style. And if you know anything about Mexican food in New England, then you probably know you’re better off cooking it yourself. So here it is, my carne asada taco recipe:

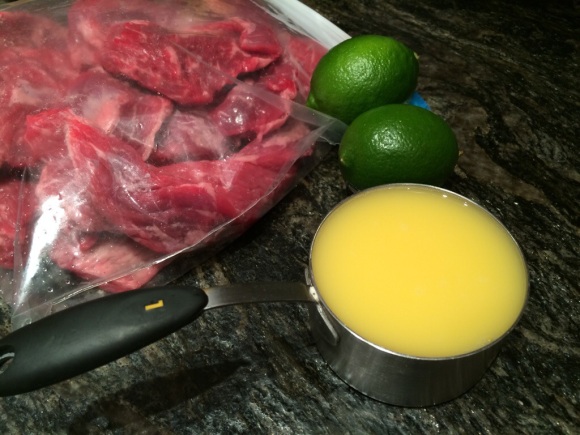
Normally I would use flank steak for this recipe but for some odd reason Stop and Shop didn’t have any, so I settled for some sirloin steak tips, which worked out nicely. Start off with your juices (OJ and lime juice), this is what really gives the carne asada that distinct, almost tangy flavor. I also add some soy sauce for a little savoriness.

20140409-022449.jpg

Then add your spices. That spice mix may look familiar.

20140409-022504.jpg

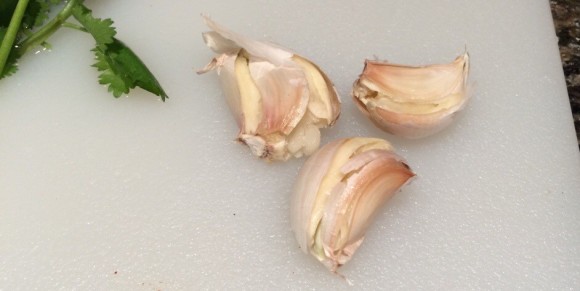
Smash some garlic cloves, mince, and chop some cilantro.

20140409-022527.jpg 20140409-022537.jpg 20140409-022547.jpg

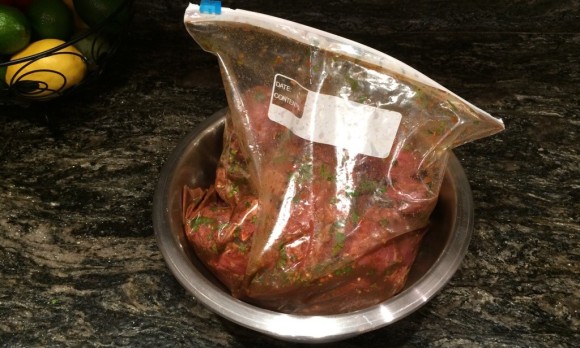
Throw it all into your bag o’ meat, seal it, then refrigerate overnight. Here’s a tip: keep the bag in a bowl just in case there are any leaks in your zip-lock bag. I had to learn this the hard way. Meat juice all over my vegetables, never again.

20140409-022629.jpg

The next day, fire up the grill, and cook it all to a nice medium rare. I know there’s a lot of ash in that grill. I didn’t clean it out and guests were already arriving so I had to just make do. Turned out it was a bad idea because it was blocking the air vents on the bottom of the grill so the coals weren’t getting enough oxygen and cooled down a lot faster than normal.  The meat still cooked, only it was a lot slower, so there’s another lesson for you: clean out your grill!

BTW let’s hear it for natural lighting! I can finally take an overhead shot without my shadow covering everything.

20140409-022701.jpg

Here’s all you need for delicious tomatillo salsa:

20140409-022740.jpg

Tomatillos are weird. First of all, they have a husk. What’s up with that? Also when you remove the husk there’s this sticky film all over them and it’s a little unsettling. If they weren’t so darn good I would probably never eat them. Anyway, make sure you give them a good rinse to get all the sticky off.

20140409-022748.jpg

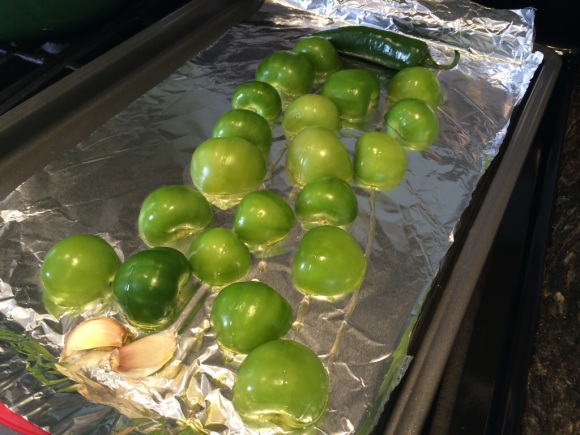
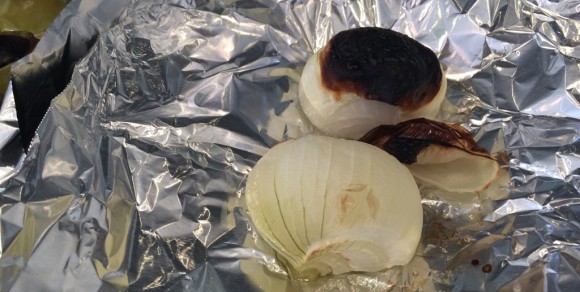
Cut them all in half, drizzle a little olive oil on top, and throw them under the broiler, along with the jalapeño and onion.

20140409-022757.jpg 20140409-022806.jpg

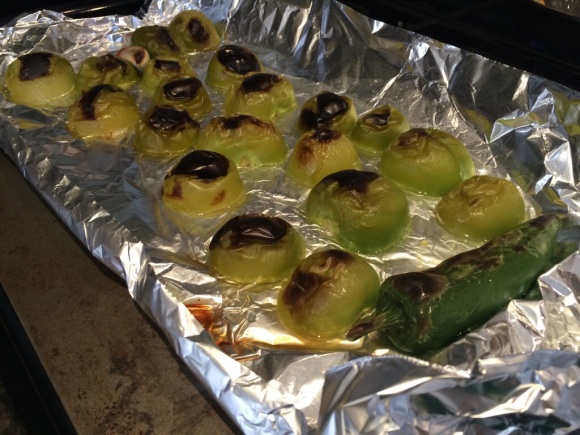
After about 10 minutes you should have a nice char like so:

20140409-022839.jpg 20140409-022856.jpg

Chop the stem off your jalapeño and throw everything in your food processor, including the fresh cilantro. If you’re not into spicy food you can remove the seeds and pith from the jalapeño before adding it. But just be a man and throw the whole thing in.

20140409-022909.jpg

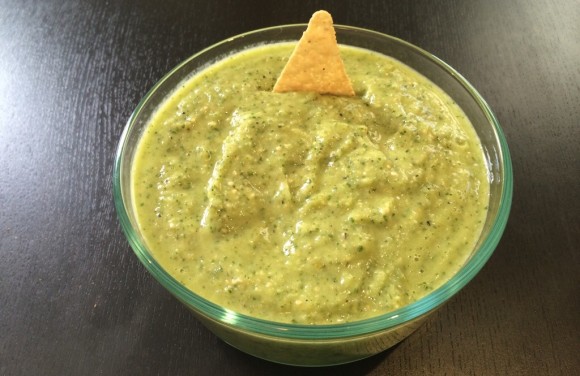
Once it’s all pureed a bit, add your avocado and process for another 30 seconds or so, and there you have it:

20140409-022920.jpg

Pico de gallo is super easy and super delicious. Here’s everything you need:

20140409-022949.jpg

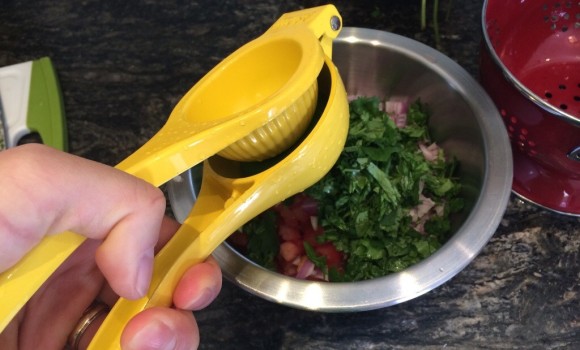
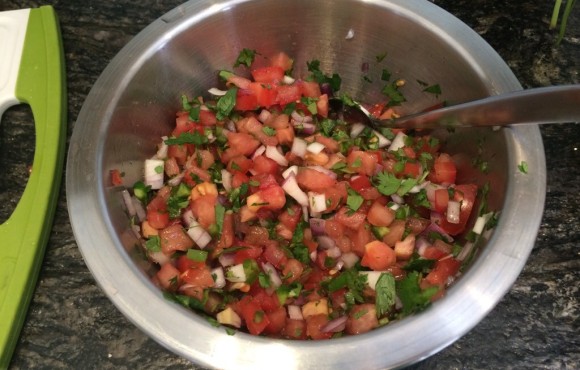
Chop it all up, throw it in a bowl, add your lime juice, and a little salt and pepper.

20140409-023010.jpg

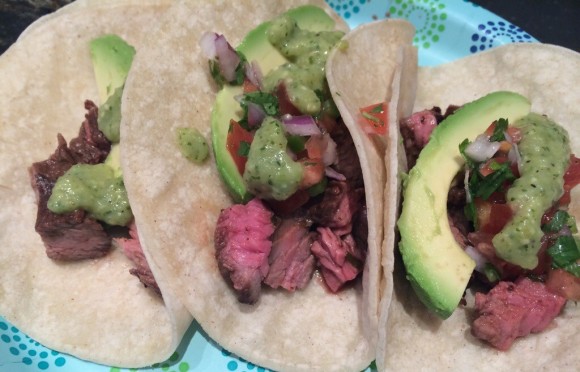
Beautiful.

20140409-023018.jpg

Viva Mexico

20140409-023050.jpg

CARNE ASADA TACOS:

3-4 lbs skirt steak, flank steak, or sirloin steak tips
1 cup orange juice
Juice of 2 limes (about 1/3 cup)
1/4 cup soy sauce
1 tbsp chili powder
1 tsp cumin
1 tsp smoked paprika
1 tsp oregano
1 tsp salt
3 cloves garlic, smashed and minced
1/2 cup fresh cilantro, chopped
corn tortillas

In a heavy duty zip-lock bag, combine all ingredients, seal it, then mix it all up with your hands. Put the bag in a large bowl and let marinate overnight, or for at least 6 hours.

The next day, take your meat out about 30 minutes before you’re ready to cook to allow meat to come to room temperature. Heat your grill, then cook carne asada to a medium rare. Let meat rest 10 minutes before chopping it up for tacos.

Heat up a cast-iron skillet with a little oil and heat your tortillas on the skilled for about 30 seconds before assembling your tacos. This will make the tortilla more pliable and less likely to break apart when you’re eating.


CREAMY TOMATILLO SALSA:

1 1/4 lbs fresh tomatillos, husks removed and rinsed clean
1 medium Spanish onion
1 jalapeño
1 large avocado
2 cloves garlic, unpeeled
Juice of 1 lime
1 cup chopped fresh cilantro (about half a bunch, chopped)
Salt and Pepper
Olive Oil

Cut all the tomatillos in half and place them cut-side down on a baking sheet, along with the jalapeño, garlic, and onion. Drizzle with a little olive oil- you don’t have to coat everything completely, just as long as there’s a little oil on there. Turn on broiler to High and place the baking sheet with your ingredients under the flames, broiling for 8-10 minutes.  Make sure you check on them so they don’t burn TOO much. You do want SOME char but you definitely don’t want them decimated by the fire. Once they’re cooked, take the ingredients out and let cool. Peel the garlic, chop the stem off the jalapeño and do a rough chop to the garlic, jalapeño, and onion. 

Fit your food processor with a metal blade, then add the tomatillos, jalapeño, garlic, and onion. Process for about 30 seconds, then add the lime juice, salt, pepper, cilantro, and avocado. Process for another 30 seconds or until it is a smooth consistency. Taste for seasoning and add more salt or pepper to taste.


PICO DE GALLO:

4 Roma Tomatoes, finely diced
1/2 small red onion, finely chopped
1 jalapeño, finely chopped
1/2 cup finely chopped cilantro
Juice of 1 lime
Salt and Pepper

Combine all ingredients in a mixing bowl. Serve with tacos!


beer pairing suggestion: There’s a lot of citrus and spice going on in this meal, and we’re using a pretty lean cut of beef here, so a light IPA or a lager would go nicely with these tacos. Try Maine Beer Co Another One IPA or Brooklyn Lager or you can never go wrong with some Negra Modelo when eating Mexican!


Tagged , , , , , ,